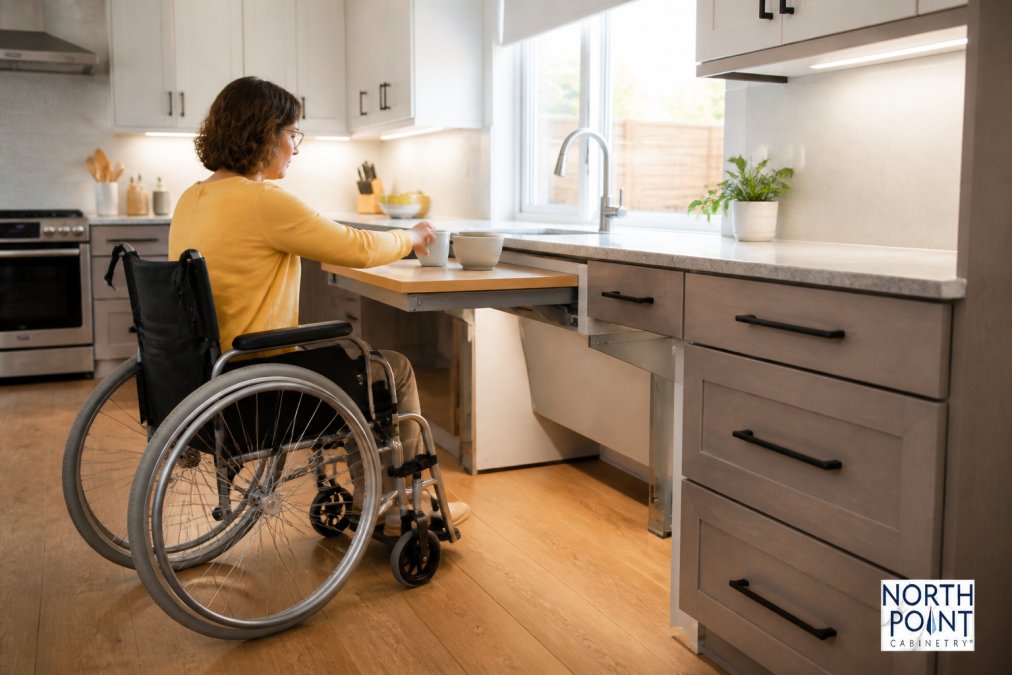
 listicle
Wheelchair Friendly Kitchen Design Ideas for 2026
Table of Contents
- Wheelchair Friendly Kitchen Design Ideas That Look Beautiful
- Start with the Wheelchair Turning Radius Kitchen Standard
- Plan for the Right Accessible Kitchen Cabinet Height
- Idea 1: The Roll-Under Sink and Prep Station
- Idea 2: Appliance Placement for Safe Reach
- Idea 3: Pull-Out Storage and Smart Organizers
- Idea 4: Open Floor Plans and Island Alternatives
- Idea 5: Slip-Resistant Flooring and Finishes
- Bringing It All Together in Plainfield, IL
- Frequently Asked Questions
Last Updated: September 9, 2026
A truly accessible kitchen should never look like a hospital ward. Homeowners across Plainfield, IL, and the surrounding Chicago suburbs are proving that wheelchair friendly kitchen design ideas can deliver both full mobility and a warm, welcoming aesthetic. At A-Top Remodeling Inc., we have spent over 30 years blending form with function, and we know the secret is in the details: the right measurements, the right hardware, and the right layout. This guide breaks down five proven design strategies that keep your kitchen beautiful while making every counter, cabinet, and appliance genuinely usable from a seated position.
The most important shift in thinking is to stop treating accessibility as a constraint and start seeing it as a design opportunity. A wheelchair friendly kitchen prioritizes clear movement paths, reachable storage, and surfaces that accommodate a person's knees. When planned correctly, these features simply look like thoughtful, modern design. Below, we will show you exactly how to achieve this balance, covering the technical standards you need to know and the specific ideas that make the biggest daily difference.
Wheelchair Friendly Kitchen Design Ideas That Look Beautiful
The best accessible kitchens share one trait: they do not announce their accessibility. They look like any high-end remodel until you notice the details that make them effortless to use. This is achieved through careful material selection, consistent countertop runs, and cabinetry that hides its functionality behind clean fronts.
A common mistake is treating each accessible feature as an isolated add-on. Instead, the entire room should work as one system. For example, a lowered counter only helps if the flooring allows a smooth approach and the cabinet hardware is easy to grip. The most successful projects begin with a complete plan rather than a list of separate modifications. This holistic approach is what separates a cohesive, beautiful kitchen from a space that feels pieced together.
Start with the Wheelchair Turning Radius Kitchen Standard
Before picking out countertops or faucets, you need to establish the floor plan's foundation. The wheelchair turning radius kitchen standard is the single most important measurement in an accessible design, and it dictates how the entire room flows.
The universal guideline, which aligns with the ADA Standards for Accessible Design, calls for a clear floor space of at least 60 inches in diameter to allow a wheelchair to make a complete 180-degree turn without backing up. This does not mean you need a massive empty circle in the middle of the room. It means the clear floor space between cabinets, islands, and appliances must allow for this turning circle at key decision points, such as at the sink, the stove, and the entryway.
Planning for this standard early prevents costly mistakes later. If you are working with a smaller or oddly shaped space, a professional designer can help you find where the turning radius can overlap with work zones. This is where the expertise of a local remodeling team in Plainfield becomes invaluable, as they can visualize traffic patterns in a way that is difficult to do on paper alone.
Plan for the Right Accessible Kitchen Cabinet Height
Counter height is the next critical decision, and it often surprises people how much variation is needed. The correct accessible kitchen cabinet height is not a single number but a range of options designed to suit the individual user's reach and comfort.
For a seated user, the standard counter height is typically between 28 and 34 inches, which is lower than the standard 36-inch counter. This allows the user to pull up close and work comfortably without straining their shoulders. However, it is not just the main work surface that matters. A multi-level counter design is often the best solution, providing a lowered section for food prep and a standard-height area for tasks like mixing or using small appliances that need clearance underneath.
The key is to focus on the "reach range." Guidance from the U.S. Access Board suggests that forward and side reaches should be kept between 15 and 48 inches from the floor for maximum accessibility. This means the most frequently used items, like pots, pans, and everyday dishes, should be stored within this band. Upper cabinets that are too high, or deep lower cabinets that require bending, are the primary culprits in making a kitchen feel inaccessible.
Idea 1: The Roll-Under Sink and Prep Station
This is the cornerstone of any functional accessible kitchen. A roll-under sink is designed to allow a wheelchair user to pull directly underneath the basin, eliminating the need to reach across a countertop.
To achieve this, the sink base cabinet is left open or fitted with a shallow, removable panel. The plumbing is set back against the wall, and the drain is placed toward the rear of the sink to maximize knee and foot clearance under the bowl. Insulating the pipes is essential to protect legs from burns, and a stylish, gooseneck or side-mounted faucet keeps the controls within easy reach.
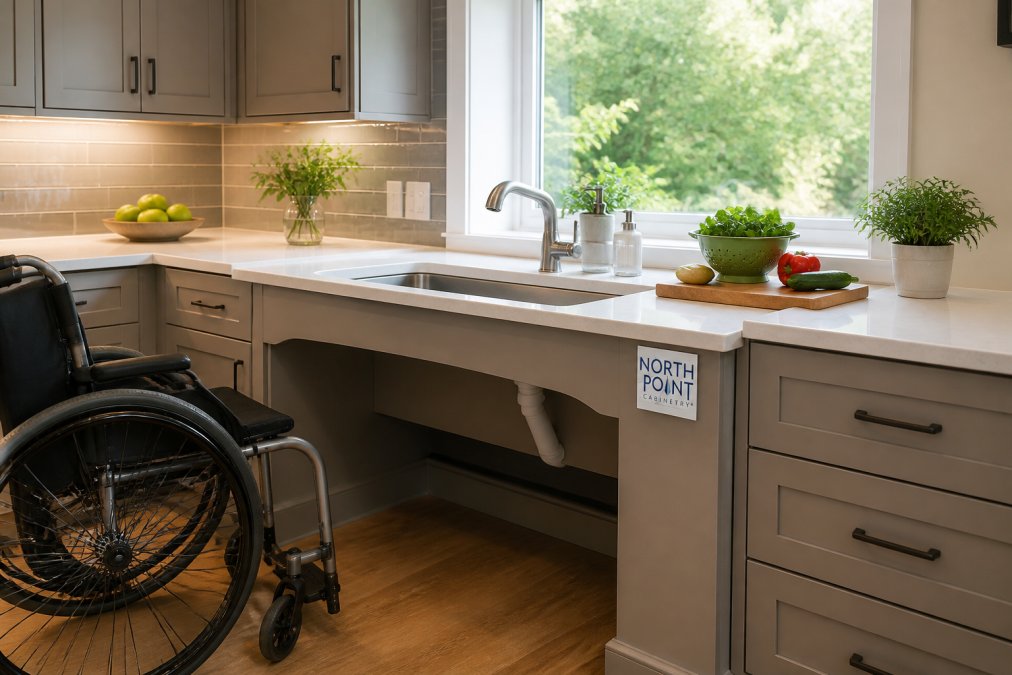
Beyond the sink itself, consider extending this concept into a full prep station. A stretch of lowered countertop next to the sink, with open space below, provides a dedicated area for chopping and mixing. This gives the user a clear workspace where they can sit comfortably and work for extended periods, which is a significant upgrade over trying to use a standard-height counter from the side.
Idea 2: Appliance Placement for Safe Reach
The layout of your appliances can either make your kitchen a joy to use or a daily obstacle course. The goal is to place appliances so that every component is reachable without stretching, reaching over a hot surface, or transferring from the wheelchair unnecessarily.
For the cooktop, a front-control model is a non-negotiable safety feature. With the controls located at the front of the unit, a seated user can turn the burners on and off without leaning across hot pots and pans. Wall ovens should be installed with the side-hinged door opening away from the wheelchair, and the interior rack should be at a height that allows for a side transfer to access heavy dishes safely.
The microwave is another appliance that is often placed too high. For a wheelchair friendly kitchen, the microwave should be built in at a height between 30 and 36 inches, or positioned under the counter. A drop-down door model is a smart choice, as it creates a shelf to slide a hot dish onto, eliminating the need to lift straight up and out.
Idea 3: Pull-Out Storage and Smart Organizers
Accessibility is largely a storage problem. If you cannot see it or reach it, you cannot use it. Pull-out storage solutions solve this by bringing the contents of deep cabinets and pantries directly to the user.
Base cabinets with full-extension drawers are far superior to traditional shelves. When the drawer is fully open, the entire contents are visible and within reach. This eliminates the frustrating and often painful task of digging through dark, deep cabinets. For corner cabinets, a lazy Susan or a specialized pull-out swing shelf system makes use of otherwise wasted space.
Here is a quick comparison of storage options to consider:
| Storage Type | Best For | Key Benefit | Accessibility Rating |
|---|---|---|---|
| Full-Extension Drawers | Pots, pans, dishes | Entire contents visible and reachable | Excellent |
| Pull-Out Pantry Shelves | Canned goods, dry food | Heavy items glide forward on tracks | Excellent |
| Lazy Susan (Corner) | Small appliances, staples | Maximizes hard-to-reach corner space | Good |
| Standard Fixed Shelves | Light, rarely-used items | Low cost | Poor for daily use |
Idea 4: Open Floor Plans and Island Alternatives
The traditional kitchen island, while popular, can be a significant barrier if it is not designed correctly. A standard island with closed base cabinets can trap a wheelchair user, preventing them from reaching the main work areas. The solution is to either design an open island or skip it in favor of a peninsula that creates a better traffic flow.
If you love the look of an island, it must have a minimum clearance of 40 inches on all sides, and ideally 60 inches on the primary work side to accommodate the turning radius. An island with an overhang on one side provides a perfect seating or work area where a wheelchair can pull up underneath. This creates a multi-functional space for food prep, dining, or even homework.
For smaller kitchens in Plainfield, a peninsula is often the smarter choice. A peninsula extends from a wall or run of cabinets and offers the same benefits as an island, but it creates a natural division of space without breaking the flow of the room. It can feature a lowered roll-under section on one side, providing a dedicated accessible workspace without sacrificing the entire layout.
Idea 5: Slip-Resistant Flooring and Finishes
The flooring is the foundation of safety in any kitchen, but it is especially critical in a wheelchair friendly kitchen. The surface needs to provide good traction for wheels and for feet, especially when wet.
Hard, smooth surfaces like polished stone or tile can be slippery. A better choice is a textured porcelain tile, luxury vinyl plank with a high slip-resistance rating, or a sealed cork floor. These materials offer grip without looking institutional. When selecting flooring, look for a high Coefficient of Friction (COF) rating, which indicates how slip-resistant the surface is.
Beyond the material itself, the transition between rooms is a detail that is often overlooked. Thresholds that are higher than a quarter of an inch can be a tripping hazard and difficult for wheelchair wheels to cross. Ensure that the flooring transitions between the kitchen and adjacent rooms are flush or use a beveled threshold to create a smooth, seamless path. This attention to detail is what allows for effortless movement throughout the entire home.
Bringing It All Together in Plainfield, IL
Designing a wheelchair friendly kitchen is about making thoughtful choices that prioritize independence and safety without compromising on style. From the initial measurement of your turning radius to the final selection of slip-resistant flooring, every decision contributes to a space that truly works for you and your family.
Homeowners in Plainfield and the surrounding Chicago suburbs searching for a "kitchen remodel near me" that understands these nuances need a partner who listens. We understand the desire for a space that feels like home, not a medical facility. Our team at A-Top Remodeling Inc. brings over 30 years of experience to the table, offering custom cabinet design, professional installation, and durable flooring solutions tailored to your specific needs and budget.
Designing an accessible kitchen that looks beautiful is a challenge, but it is one you do not have to face alone. We are proud to offer a free measuring consultation, bringing samples directly to your home so you can see and feel the materials. With our custom design tailored to your preferences and a current offer of 20% off your entire kitchen project, now is the perfect time to start your transformation. Get started with A-Top Remodeling Inc. and build a kitchen that welcomes everyone, blending seamless accessibility with the timeless style your Plainfield home deserves.
Frequently Asked Questions
What are the ADA requirements for a wheelchair accessible kitchen?
ADA kitchen design guidelines focus on clear floor space, reach ranges, and knee clearance. The standard calls for a 60-inch turning radius or a T-shaped turnaround, counters between 28 and 34 inches high for forward approach, and at least 27 inches of knee space under sinks and cooktops. Work surfaces should have controls and outlets within accessible reach. While these rules apply to public spaces, following them at home creates a safer, more comfortable kitchen for wheelchair users.
How much space is needed for a wheelchair to turn around in a kitchen?
The wheelchair turning radius kitchen standard requires a clear 60-inch diameter circle for a full 360-degree turn. If your kitchen cannot accommodate a full circle, a T-shaped turnaround space can work as an alternative. This means planning for wide, unobstructed pathways between counters, islands, and appliances. A professional design consultation can help you map out these clearances before any demolition begins.
What is the best countertop height for a wheelchair user?
Most wheelchair users find a counter height between 28 and 34 inches most comfortable, depending on their sitting height and arm reach. The standard 36-inch counter is often too tall. Installing a section of lowered counter for food prep, or an adjustable-height counter, gives you flexibility. For a roll-under sink, the counter must be low enough to allow knee clearance while keeping the sink basin usable.
How do you make a kitchen sink accessible for a wheelchair?
An accessible sink needs open space underneath so you can roll your knees under the basin. Shallow sinks, ideally 5 to 6 inches deep, allow the faucet to remain within reach. Insulate exposed pipes to prevent burns. A single-lever or touchless faucet makes water control easier. Position the sink with clear counter space on at least one side for staging items.
How can I make my wheelchair friendly kitchen look stylish, not clinical?
Focus on the same materials and finishes you would choose for any kitchen. Quartz or butcher block counters, shaker-style cabinets, and warm wood or luxury vinyl flooring all work well. The accessible features, like roll-under sinks and pull-out shelves, can be integrated seamlessly into the design. Good lighting and a cohesive color palette keep the space feeling like a beautiful kitchen first, with accessibility built in.